I think it would not be inaccurate to say that I am a full-on, unabashed yogurt fiend. I happily gobble up yogurt at least once a day. For me it is heaven. And luckily for me and all fellow yogurt fiends, it’s incredibly good for you too!
Yogurt, or fermented milk of one type or another has been made in many cultures, and has been an important part of many societies since ancient times. Mention of yogurt in its various forms can be found popping up in ancient texts of India, Greece and Persia, and some even believe that the biblical reference to “the land flowing with milk and honey” speaks of the traditional Israeli yogurt and honey drink that was commonly consumed at the time.
Yogurts health benefits have been central to its importance since these ancient times as well. In Persian tradition Abraham’s long life and fertility were purportedly down to his consumption of yogurt. In the 14th century France, when King Francis I was cured of severe and incurable diarrhea by yogurt given to him by Suleiman the Magnificent, Sultan of the Ottoman Empire, he was so impressed that he became a bit of a yogurt disciple, spreading the word of its medicinal properties across his kingdom.
As the longevity and sustained popularity of this unassuming food has never wavered, clearly Suleiman the Magnificent was onto something. Now with a power of science behind it, the nutritive value of yogurt is well known and defined. Apart from all of the nutrition that come from the milk it’s made of, the pro-biotic, fermented nature of active yogurt bring a myriad of health benefits. There’s evidence that the beneficial bacteria in yogurt help to regulate digestion (and may even be of benefit for people suffering from IBS), boost immunity, lower cholesterol, and help with vitamin synthesis making the nutrients in the milk more easily used by our bodies. Good news for those of us who can’t get enough of this ancient wonder food.
As I say, I love it enough that there’s rarely a day when I don’t have some (who am I kidding, there’s rarely a day when I don’t have two helpings!) and my boys love it too. Happy days! However, with all of this yogurt consumption going on in our house, I rarely think to actually make it myself though. So a couple of weeks ago I decided to have a go for the first time in about two years (and for the first time without the help of my dairy-farmer-sister-in-law). My first attempt was a little off as I had assumed that I remembered how to make it without the need to refresh my memory by looking it up. I assumed wrongly (turns out that the fermentation stage does not, in fact, take about an hour…it’s quite a lot longer in fact). The second attempt I ended up accidentally cooking the fermenting yogurt and ended up with something somewhere in between flavourless yogurt and flavourless cottage cheese. Not great. Happily though, after finding this amazingly resourceful website, makeyourownyogurt.com, my third attempt was lovely, thick, creamy and tangy. Spurred on by the glory of a triumphant yogurt coup (and the fact that I had consumed the successful batch within half a day and was in need of more) I decided to branch out into yogurts unknown, more specifically, coconut yogurt.
As I am neither a vegan nor a follower of a paleo diet, my yogurt of choice is rich, creamy, full-fat plain yogurt to which I often add honey along with fruit, granola, and pretty much anything else that gives me an excuse to eat some yogurt. (I never go for fat free as I don’t really believe that there’s a benefit to fat free stuff when it comes to natural foods, it’s more satisfying, so keeps me going for way longer than it’s fat free version, and I just prefer it hugely.) Lately though I’ve been seeing coconut yogurt everywhere, and as a big fan of the coconut, I was very intrigued. I find the price of coconut yogurt more than a tad prohibitive though, so had not tried it until I decided to have a go at making it myself.
Upon googling “How to make coconut yogurt” I found that there are a few things to consider:
- Dairy yogurt thickens through fermentation without any additional thickeners, where as because of the difference in its composition, coconut milk doesn’t thicken on its own when being turned into yogurt, so you can either enjoy it a bit on the runny side (which would be lovely too)or if like me you like it thick and creamy then you can omit the water from the coconut milk and just use the cream, or use a thickener. Some methods suggest a gelling agent for this purpose, like agar agar, and others suggest starch. I opted for tapioca starch (or flour)as this tuber derived starch has an abundance of health benefits of its own, and I also decided to give it extra thickness by using two cans of coconut milk (or try making your own) and using the whole of one can and just the cream of the other. If you’re not using thickeners you just need to bring the milk to the boil to kill off any existing bacteria, but with thickeners you may need to simmer it for longer to give it time to thicken.
- Coconut yogurt is best made with the addition of a sweetener such as maple syrup or agave nectar as the bacteria need more to feed on, in milk it uses the lactose. As honey has anti-bacterial properties which I’m guessing could hinder the development of the bacteria during fermentation.
- The fermentation stage with dairy yogurt takes between 6-9 hours, depending on how much of that sour yogurt tang you want to develop, but with coconut milk it’s substantially longer, 24 hours seems to be a good amount of time. During this stage the yogurt needs to be kept at a consistent, warm temperature. In our Rayburn we have a warming oven, and leaving it in there with the door ajar seemed to work perfectly. Other options which I’ve heard suggested are to place the container on a warming pad and wrap a couple of tea towels around it, place it on a warming pad within a cooler, or simply place it in the oven with just the oven light on.
- As for your culture you have a few options. You can buy freeze-dried packets of yogurt starter, use the contents of a couple of split open capsules of probiotic supplements, or you can use a couple of tablespoons of live yogurt. As the vegan issue doesn’t come into it for me I used two tablespoons of regular, plain, dairy yogurt, but if you’re a vegan or avoiding dairy then you could use some coconut or soy yogurt instead (just make sure it’s live/active yogurt of some kind).
Making yogurt is an easy process and I think one that’s well worth the effort. I’m really excited that I can now whip up some coconut yogurt when I want, or easily make my own dairy version. Making your own saves you some cash, gives you the freedom to add (or omit) anything you’d like from it, and your body with thank you!
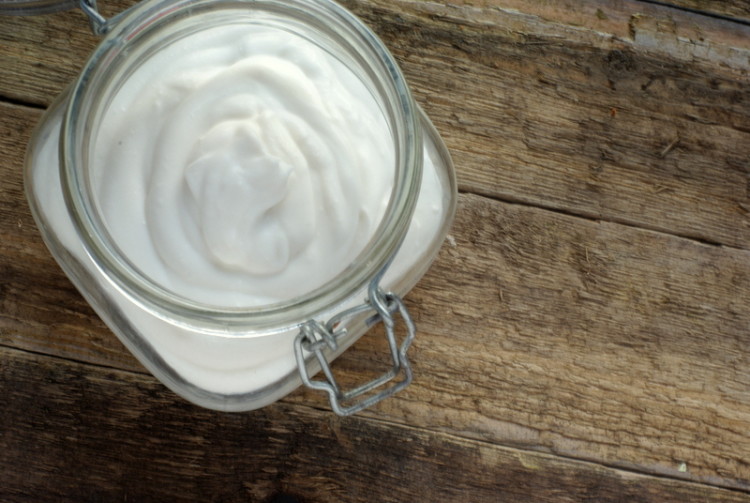
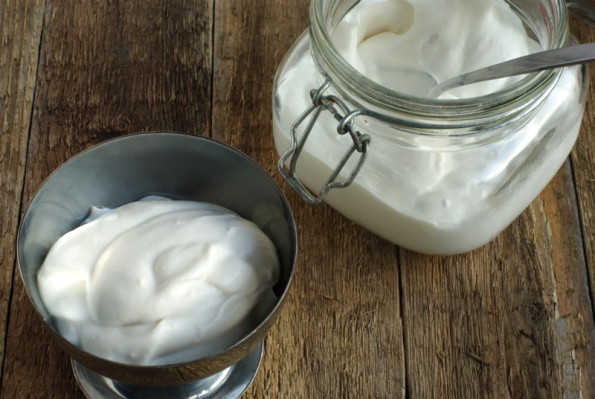
So here’s my recipe for how to make coconut yogurt. I hope you enjoy it!!
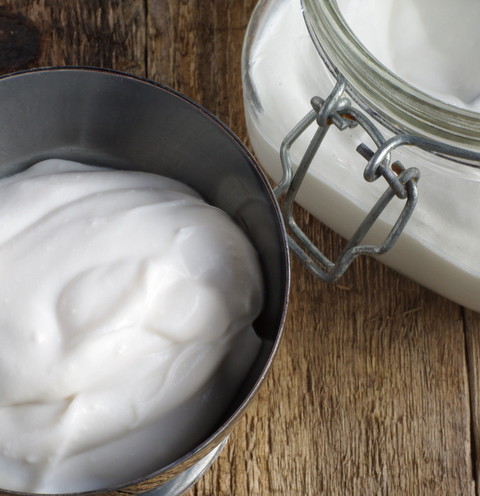

- 2 400mL tins of coconut milk(One left somewhere cool to bring the cream to the top)
- 2 Tbsp maple syrup or agave nectar
- 2 Tbsp tapioca flour
- 2 Tbsp active yogurt (if dairy is a concern, use active coconut yogurt) or yogurt starter
- Fill the sink with about 3 inches of cold water.
- Tip one can of coconut milk and sweetener into a large saucepan, and add the cream from the second one. (Keep the water to add to a smoothie, sauce or soup)Place the pot over medium heat and, stirring constantly when it starts to get hot, bring it up to a heat where it’s steaming.
- Meanwhile, once the milk is just warm tip about half a cups worth into a jug, sprinkle the tapioca over it and stir until dissolved. Add this milk back into the rest.
- Once the milk is steaming continue to stir until it’s thick enough to coat the back of a spoon.
- Once thickened to this point remove from heat and place the pot into the sink of cold water being sure not to splash any of the water into your yogurt, and stir until it’s cool enough to hold your finger in, but still warm.
- Stir in the active yogurt or starter until well combined.
- Transfer the yogurt into a sterilized jars or a warmed heat proof bowl and close the lids or, if using a bowl, cover with a well fitting pot lid.
- Place the yogurt in your turned off oven but with the oven light on and leave it for 24 hrs.
- After the fermentation time remove it from its warm spot and place it in the fridge to chill for about 4 hours (it will thicken up during cooling). Then enjoy!
- To sterilize your jars either wash them well and put them in the oven at 100 degrees Celsius for 10 min or simply run them through a dishwasher. Put the yogurt in and close them while they're still warm.


sounds delicious! I love the idea of making your own 🙂 next on the roots and wren yogurt making agenda…. coffee flavored yogurt! xoxo
Oh yum!!! I would never have even thought of that!!! Definitely on the agenda!!! 😀